The number one reason traders fail prop firm evaluations isn't a bad strategy. It's not poor entries. It isn't even revenge trading, though that helps speed things along. It's that they sized their positions like they had a $50,000 account, when in reality they had $2,500 of room before the trailing drawdown ended the evaluation. The math doesn't care how confident you are. The drawdown trails up with every winner and stays put on every loser, and one trade sized for "the account balance" can liquidate weeks of progress.
This guide explains how to size positions correctly on Apex Trader Funding and TopStep — the two largest futures prop firms — using the drawdown buffer as the real account size rather than the headline number. Worked examples for every common account tier, the difference between EOD and intraday trailing, and the math that separates traders who pass from traders who repeatedly buy resets.
The Core Mistake: Sizing Off The Headline Number
When you buy a $50K Apex evaluation, you don't have $50,000 to risk. You have $2,500 — the trailing drawdown. That's the entire distance between your starting balance and the floor that ends the account. Risking "1% of the account" sounds disciplined until you realize 1% of $50,000 is $500, which is 20% of your actual buffer. Two losing trades and the evaluation is done.
The Real Account Size Formula
Effective Account Size = Distance to Trailing Drawdown Floor. On a fresh $50K Apex, that's $2,500. On a $50K TopStep, that's $2,000. On a $100K TopStep evaluation, it's $3,000. The most common cause of evaluation failure is hitting max drawdown — not strategy failure. It's a sizing problem.
The fix is simple in concept and uncomfortable in practice: size as a percentage of your remaining drawdown buffer, not your starting balance. Five to ten percent of buffer is reasonable. Twenty percent is asking to fail. The exact math depends on which firm you're trading and which evaluation type — and Apex and TopStep handle this very differently.
Apex Trader Funding: Sizing By Account Size
Apex offers two trailing drawdown structures as of the 4.0 ruleset: End-of-Day (EOD) trailing and Intraday trailing. They have identical contract limits but very different risk profiles for sizing purposes.
EOD vs Intraday Trailing
| Feature | EOD Trailing | Intraday Trailing |
|---|---|---|
| How it updates | Once per day at settlement | Real-time during the session |
| Impact on sizing | Today's floor stays put | Floor tightens with every new high |
| Failure pattern | Multi-day drawdown | Profit-then-pullback within one day |
| Best for | Swing-style + most day traders | Scalpers who exit at peaks |
The reason this matters for sizing: under intraday trailing, a winning move that gives back before you exit can fail the account before any "loss" registers. EOD is generally the safer default for the same strategy because it locks the threshold overnight and doesn't tighten until the next session closes. Most experienced Apex traders pick EOD for this reason alone.
Apex Drawdown By Account Size
| Account | Trailing Drawdown | Max Contracts (Mini) | Max Contracts (Micro) |
|---|---|---|---|
| $25K | $1,500 | 4 | 40 |
| $50K | $2,500 | 6 | 60 |
| $75K | $2,750 | 7 | 70 |
| $100K | $3,000 | 10 | 100 |
| $150K | $5,000 | 15 | 150 |
| $250K | $6,500 | 17 | 170 |
| $300K | $7,500 | 20 | 200 |
Apex made one important change to position sizing on funded Performance Accounts (PA): contract limits scale up and down based on your end-of-day balance via the scaling level system. This doesn't apply to evaluations (which use a fixed max), but it means PA sizing has to adapt as you make or lose money.
Worked Example — Apex $50K Eval, Fresh Account
Setup: Apex $50K EOD eval, balance $50,000, trailing drawdown $2,500. Trading MNQ with a 30-tick stop. Sizing at 8% of buffer per trade.
Risk per trade: 8% × $2,500 = $200
Per-contract risk: 30 ticks × $0.50/tick = $15
Contracts: $200 ÷ $15 = 13 MNQ contracts (rounded down)
Now check the rule cap: $50K Apex allows 60 micros max. Thirteen is well inside, so 13 it is. If you lose this trade, drawdown buffer shrinks to $2,300, and the next trade's 8% sizing drops to $184 — naturally cutting position size during losing streaks instead of compounding the damage.
Worked Example — Apex $50K Eval, Profitable
Setup: Same account, but you've grown the balance to $52,500. With Apex 4.0 EOD trailing, your threshold has trailed up to $50,000 (yesterday's high minus $2,500). Buffer is now $2,500 again, but here's the catch: your drawdown is calculated against the trailing peak, which can lock once you exceed certain thresholds.
Risk per trade: 8% × $2,500 = $200 (same math, different buffer source)
Insight: Once your balance crosses the threshold where the drawdown locks (typically when you hit the safety net), the buffer effectively expands. Until that point, every new high tightens the floor. Size like you're protecting the buffer, not chasing the profit target.
TopStep: Sizing With Two Ceilings
TopStep is structurally different from Apex because it enforces two drawdown rules simultaneously: a trailing Maximum Loss Limit (MLL) that protects the account, and a Daily Loss Limit (DLL) that protects the session. Sizing has to respect both.
The Two-Ceiling Rule
On TopStep, your effective risk per trade is governed by whichever number is smaller: your distance to the MLL, or your remaining DLL for today. Most days the DLL is the binding constraint, especially after one losing trade.
TopStep Combine Specifications
| Combine Size | Trailing MLL | Daily Loss Limit | Max Minis | Max Micros | Profit Target |
|---|---|---|---|---|---|
| $50K | $2,000 | $1,000 | 5 | 50 | $3,000 |
| $100K | $3,000 | $2,000 | 10 | 100 | $6,000 |
| $150K | $4,500 | $3,000 | 15 | 150 | $9,000 |
The Combine uses intraday trailing — meaning the MLL floor moves up in real time with every new equity high. Pass the Combine and you advance to the Express Funded Account (XFA), which converts to EOD trailing and is considerably more forgiving. The single biggest reason traders fail the Combine is sizing aggressively early, hitting peak equity, then giving it back into the now-tightened floor.
Worked Example — TopStep $50K Combine
Setup: Fresh $50K Combine. Balance $50,000. MLL floor $48,000 (distance $2,000). DLL $1,000. Trading MES with a 20-tick stop.
Sizing constraint: The smaller of (10% of MLL buffer = $200) or (20% of DLL = $200). Both equal $200 today.
Per-contract risk: 20 ticks × $1.25/tick = $25
Contracts: $200 ÷ $25 = 8 MES contracts
Cap check: $50K Combine allows 50 micros max — 8 is well inside.
Now you lose this trade. DLL buffer drops to $800. MLL buffer drops to $1,800. Next trade's risk = 10% × $1,800 = $180, or 20% × $800 = $160 — the DLL is now binding, so risk drops to $160. You're effectively forced to size down after a loss, which is the entire point.
The TopStep Trailing Floor Trap
The intraday MLL is what destroys most Combines. Here's the cycle:
- Day 1: Balance $50,000, MLL floor $48,000
- You profit $1,500. New balance $51,500. MLL floor trails up to $49,500.
- You profit another $1,000. Balance $52,500. MLL floor trails up to $50,500.
- Market reverses. You give back $2,500. Balance $50,000. You're $500 below the floor and the Combine is failed — despite ending the day at your starting balance.
This is why experienced TopStep traders reduce position size as the Combine grows rather than increasing it. Protecting the floor becomes more important than maximizing the gain — the opposite of what intuition suggests. Once your balance hits starting + profit target ($53,000 on the $50K), the trailing locks at $50,000 and the trap closes behind you.
Sizing By Stage: Eval, Funded, and Live
Position sizing should change as the account changes. Here's how to think about it across the lifecycle.
During Evaluation
Most aggressive sizing happens here, but it shouldn't. The eval is the cheapest stage to fail — you lose a reset fee, not real capital. The temptation is to rush the profit target with bigger contracts. The cost is a failed eval that takes weeks to redo. Keep sizing at 5–10% of buffer, accept that hitting the profit target takes 10–20 trading sessions, and remember that 80%+ of Combines fail at this stage. The pass rate isn't low because the strategies are bad. It's low because traders try to brute-force it.
On a Funded Account (Pre-Payout)
Now there's real money behind the rules — but also real upside. The temptation flips: traders get cautious and undersize, then never make enough to hit minimum payout thresholds. The right move is to size identically to how you sized in the eval. The strategy worked there; it works here. Apex PA accounts use a scaling system where your contract limit changes based on end-of-day balance, so plan sizing around your current tier, not the max tier.
After First Payout
This is the moment most traders blow up. They've proven they can make money, so they assume they can risk more to make more. The math hasn't changed — your buffer is still your buffer. The only thing that's changed is your confidence, which is the worst possible reason to adjust position sizing. Keep the same percentage of buffer per trade. Let compounding do the work over time.
The Math That Actually Decides Whether You Pass
Two numbers matter more than entry technique in prop firm trading: your R-multiple expectancy and your maximum consecutive losses. The combination tells you whether your sizing is survivable.
Expectancy Math
If you win 45% of trades at an average 2R, your expectancy is (0.45 × 2) − (0.55 × 1) = 0.35R per trade. Risking $200 per trade, that's $70 expected profit per trade. Over 100 trades, that's $7,000 — enough to pass any eval with room to spare. The same trader winning 45% at 1R expectancy: (0.45 × 1) − (0.55 × 1) = −0.10R. Negative. The strategy loses money over time no matter how disciplined the sizing is. The classic position sizing math only works if expectancy is positive — sizing protects a winning strategy from variance, it doesn't fix a losing one.
Maximum Consecutive Losses
Even a strategy with positive expectancy will have losing streaks. The question is whether your sizing survives them. A 50% win rate strategy has roughly a 1-in-32 chance of five consecutive losses — meaning over 100 trades, expect at least one streak of five losers. If five losses in a row hits your max drawdown, your strategy is unsizable for that account, full stop.
| Win Rate | Odds of 5 Straight Losers | Odds of 8 Straight Losers |
|---|---|---|
| 40% | 7.8% per attempt | 1.7% per attempt |
| 50% | 3.1% per attempt | 0.4% per attempt |
| 60% | 1.0% per attempt | 0.07% per attempt |
| 70% | 0.2% per attempt | 0.007% per attempt |
Read this as: at a 50% win rate, every series of five trades has a 3.1% chance of being five losses. Over 100 trades that's effectively guaranteed to happen once. Size as if you will hit five losses in a row — because mathematically, you will.
Common Prop Firm Sizing Mistakes
1. Treating account size as buffer size
Covered in depth above. On a $50K Apex with $2,500 drawdown, the account size for sizing math is $2,500.
2. Ignoring the Daily Loss Limit on TopStep
The DLL is the binding constraint on most TopStep trading days, but traders forget it exists until they hit it. Size with both ceilings in mind, not just the trailing MLL. Hitting the DLL halts trading for the rest of the session, which doesn't fail the account but resets your daily progress to zero.
3. Picking Apex Intraday trailing for the wrong style
Intraday trailing punishes you for round-tripping profit within a session. If your style takes 2–3 hours to develop into a winner, you'll often watch the floor tighten on you before exit. EOD trailing solves this for almost all day-trading styles. Pick Intraday only if you scalp out at peaks and don't hold through pullbacks.
4. Increasing size after passing the Combine
You passed because of how you sized. Changing that on Day 1 of the funded account because "now it's real money" is how Day 7 becomes "back to the drawing board." The strategy didn't change. The sizing shouldn't either.
5. Sizing for the profit target instead of the buffer
"I need $3,000 to pass and I have 20 days — I'll just risk $150 per trade with 2R targets." This math works if you win 75% of the time. You don't. Size for survival first. The profit target arrives when expectancy compounds, not when you force it.
Putting It Into Practice
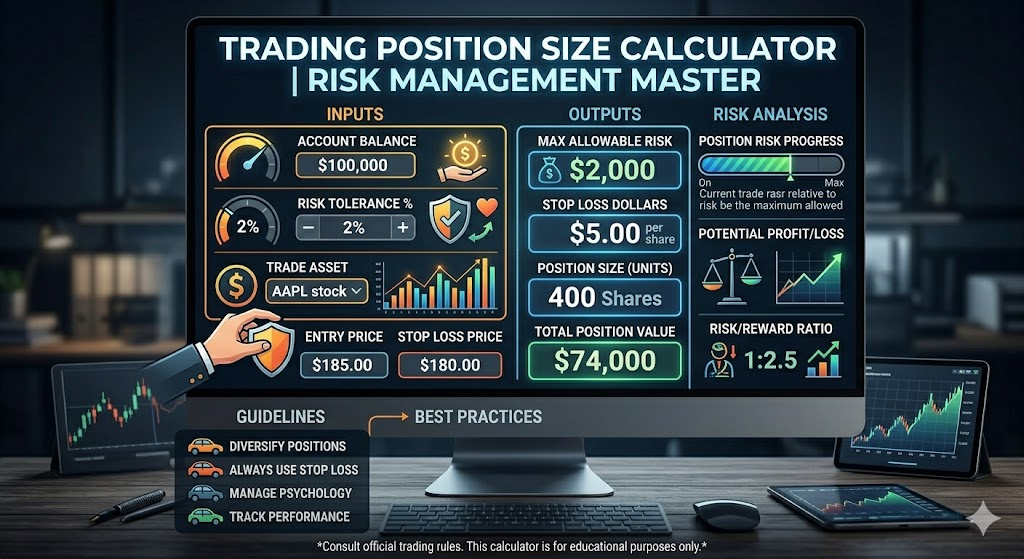
The single most useful exercise: before each trading day, calculate your maximum risk per trade for that session and write it on a sticky note next to your monitor. Use the smaller of (10% of remaining drawdown buffer) or (20% of remaining daily loss limit, if applicable). Then size every trade off that number using the position size calculator. Trades that don't fit the budget either get a tighter stop, a micro contract, or get skipped entirely.
This sounds restrictive. It is. That's the point. The traders who pass prop evaluations consistently aren't the ones with the best entries — they're the ones who size like they expect to be wrong. Because prop firm rules were designed by people who know retail traders blow accounts by sizing for confidence rather than for variance, and the rules will end your evaluation faster than your strategy can save it.
Run The Numbers
The calculator has a built-in prop firm mode with presets for Apex and TopStep across every common account size.