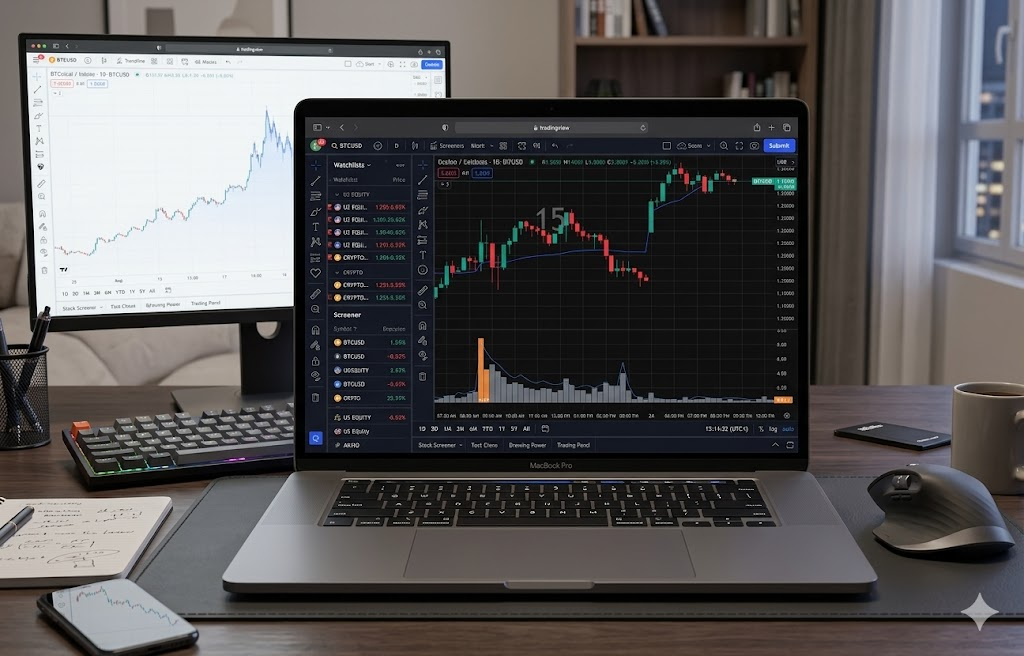
Most TradingView volume indicators try to tell you everything. This one tries to tell you one thing: is this bar's volume unusual for this exact time of day? That's it. No divergence tints, no z-score overlays, no nine-row info table. Just colored volume bars, a single time-of-day baseline line showing the typical session pattern, and a rare label on the bar that actually matters.
We built Session Volume Pulse, scrapped a more elaborate first version, then rebuilt it with two-thirds of the features removed. The leaner result is more useful — and that's the story of why.
The problem with most volume indicators on TradingView
Open TradingView's indicator library and search "volume." You'll get more than 5,000 results. Most of them suffer from one of two failure modes. The first is showing too little: raw volume bars, no context, the same display you'd get on any free chart since the 1990s. The second is showing too much: divergence detection, momentum oscillators, smart money flow, point-of-control overlays, OBV crossovers, all stacked on one indicator pane until the chart is unreadable.
The interesting question — "is this volume actually unusual right now, or just normal for this time of day?" — almost never gets answered well. The reason is that intraday volume has a strong session-of-day pattern. The 9:30 open is always busy. Noon is always quiet. The 3:50 PM close is always busy. A raw volume indicator showing a 3× spike at the 9:30 open isn't telling you anything interesting — that's just what 9:30 looks like. A 3× spike at 1:15 PM, on the other hand, is genuinely unusual. The chart should make that distinction obvious. Most don't. Our day trading guides dig deeper into why time-of-day context matters more than raw averages.
What Session Volume Pulse [TSL] does
Two things, both visible at a glance.
One: a subtle blue line plotted in the volume pane showing the average volume for this exact minute of the trading day, averaged across the trailing 21 sessions. On a 15-minute chart of NQ futures, the 9:45 AM bar's baseline is the average of all the 9:45 AM volumes from the past 21 trading days. The line curves upward at the open, dips through lunch, rises again into the close — because that's what the average session looks like. Now you can see at a glance whether the current bar is heavier or lighter than a typical session at this exact minute.
Two: a vertical multiplier label drawn only on bars where volume is at least 2.5× the recent 12-bar average. The label reads as a stacked column: 2.7×. Most bars don't get a label. The ones that do are the ones worth paying attention to.
That's all. No divergence detection. No momentum oscillators. No corner table. No nine alerts to configure. The full indicator has 11 settings, of which 6 are just colors. The settings panel fits on one screen.
Why we cut nine features
The first version of this indicator did everything. Four bar colors. Time-of-day plus z-score. Spike detection plus mega-spike detection. Bullish and bearish divergence background tints. A nine-row info table. Five alert conditions. Eighteen settings.
It worked. Every feature did what it claimed to do. The problem is that the chart became a wall of information and traders couldn't read it at a glance. A divergence tint firing every third bar on a trending day. Four bar colors that took several seconds to mentally decode. A label saying 2.7× Vol Spike (mega) taking up a quarter of the available vertical space.
The honest moment came when we noticed the labels firing constantly during normal market activity. Divergence detection on a 15-minute chart fires whenever price makes a new 10-bar high while volume is below average — which happens on most trending bars. The signal-to-noise ratio collapsed. Worse, the visual clutter made the actual useful signal — the rare, genuine spike — harder to spot, not easier.
We sat with the question: what is this indicator actually for? The answer was simple: detecting unusual volume in context. Everything that wasn't that became noise. So we cut nine features, kept two, and ended up with something a new user can understand in three seconds. More thoughts on this in our trading psychology coverage — chart simplicity isn't a stylistic choice, it's a cognitive one.
The principle: a great indicator shows you one thing well. A mediocre indicator shows you ten things and lets you figure out what matters. The best traders in any era have used the simplest charts — not because they're allergic to complexity, but because complexity competes with their attention. The chart's job is to surface the signal, not bury it.
How the time-of-day volume baseline actually works
The math is straightforward and worth understanding because it determines whether the baseline is accurate for your chart.
For each bar on your chart, the indicator looks back at the volume from the same time of day in past sessions. It strides backward by exactly one session's worth of bars — for a 15-minute chart of NQ futures, that's 92 bars (~23 hours of trading) — repeats for 21 sessions, then averages those 21 volumes. The result is the baseline value for the current bar.
The crucial setting is bars per session. The default of 0 tells the indicator to auto-calculate, assuming a 24-hour market (96 bars on a 15m chart). This works perfectly for crypto and forex, is close enough for 23-hour futures (only ~1 hour off), but is wrong for shorter-session markets like US stocks during regular trading hours.
Bars per session reference table
Use the values below for the most common day trading instruments and timeframes. Plug your number into the "Bars per session (0 = auto)" input in the indicator's settings panel.
| Market | Timeframe | Bars per session |
|---|---|---|
| Crypto, forex (24/7 or 24/5) | Any intraday | 0 (use auto) |
| NQ, ES, MNQ, MES futures (~23h) | 1m | 1380 |
| NQ, ES, MNQ, MES futures (~23h) | 5m | 276 |
| NQ, ES, MNQ, MES futures (~23h) | 15m | 92 |
| NQ, ES, MNQ, MES futures (~23h) | 30m | 46 |
| NQ, ES, MNQ, MES futures (~23h) | 1h | 23 |
| CL crude oil, GC gold futures (~23h) | Same as above | Use the NQ/ES values |
| US stocks RTH (6.5h) | 1m | 390 |
| US stocks RTH (6.5h) | 5m | 78 |
| US stocks RTH (6.5h) | 15m | 26 |
| US stocks RTH (6.5h) | 30m | 13 |
4h and higher timeframes — turn the baseline off. The math runs out of room. A 23-hour futures session contains only ~6 four-hour bars, which means the baseline is averaging six samples per time-of-day slot instead of the dense 92-sample grid you get at 15m. The line becomes coarse and noisy, and the "same time of day" comparison loses most of its meaning. Uncheck "Show time-of-day baseline" on the 4h timeframe and above. The spike detection still works fine at any timeframe — the session baseline is specifically an intraday tool. Our futures trading section covers higher-timeframe analysis where different tools apply.
The reason for being explicit about this is honesty. The indicator claims to compare volume against the same time of day. If the stride is wrong, that claim becomes false — you'd be comparing 9:45 AM against random other times of day, which generates noise instead of signal. For stock day traders especially, this setting is the difference between a meaningful indicator and a misleading one.
How to read the chart
Three patterns are worth knowing.
Pattern 1 — Bar above the baseline, no spike label
The current bar's volume is higher than the typical bar at this time of day, but not dramatically so. This suggests slightly elevated participation — the market is paying a bit more attention than usual to this minute, but it's not yet a conviction event. Treat as soft confirmation of whatever directional setup you're already watching.
Pattern 2 — Bar at or below the baseline, no spike label
Normal session activity. The bar is doing what you'd expect at this time of day. This is the most common pattern and the chart correctly tells you to ignore it. Most of trading is waiting for a signal worth acting on; this pattern says "no signal yet."
Pattern 3 — Spike label appears (vertical multiplier on the bar)
The current bar's volume is at least 2.5× the recent 12-bar average. This is the signal worth your attention. Combined with the baseline line, you can immediately tell whether it's a "spike that confirms the time of day" (e.g., big volume right at the open, which happens daily and is less meaningful) or a "spike that breaks the typical pattern" (big volume at noon, which is genuinely unusual and often precedes a real move). More volume confirmation tactics in our trading education hub.
What the indicator does not do: it does not predict direction. A volume spike with a green close is bullish confirmation. A volume spike with a red close is often capitulation or distribution — bearish. The indicator surfaces the conviction event; reading direction is on you.
Settings reference
The full indicator has 11 settings. Most users will only touch two or three of them after the initial setup.
| Setting | Default | What it does |
|---|---|---|
| Acceleration lookback (bars) | 12 |
How many recent bars to average for spike detection. 12 ≈ 3 hours on 15m. Use 20 for daily charts. |
| Spike threshold (× average) | 2.5 |
How much above average a bar must be to get a label. Lower = more labels. |
| Show time-of-day baseline | on |
Toggle the blue baseline line. |
| Baseline sessions to average | 21 |
How many past sessions feed the baseline. 21 ≈ one calendar month. |
| Bars per session | 0 (auto) |
Critical for stock RTH charts and non-15m futures charts. See table above. |
| Show spike labels | on |
Toggle the vertical multiplier labels. |
| Spike label position | Below bar |
Below keeps the bar visible above. Above emphasizes the spike. |
| Normal volume bar | grey | Color for non-spike bars. |
| Spike bar | orange | Color for spike bars. |
| Baseline line | blue | Color of the session baseline line. |
Two alert conditions, both useful
The indicator exposes only two TradingView alerts, on purpose.
Volume spike — fires when a bar's volume is ≥ 2.5× (or whatever you set) the recent average. Use this as a "look at the chart" alert during multi-symbol monitoring. If you're watching 10 futures contracts at once, this alert tells you which one just did something worth attention.
Crossed session baseline — fires when volume transitions from below the typical session level to above it (or vice versa). This is a quieter signal indicating a regime change: the market just became more (or less) active than typical for this minute. Useful for spotting the start of a real session before the spike fires.
Honest limitations
A few things worth acknowledging about what this indicator does NOT do, because closed-source competitors often hide their limitations.
It does not detect direction. A spike is a conviction event but not a directional signal. You still have to read the candle, the structure, and the context. The indicator surfaces the moment to look; it does not tell you which way to lean.
It does not work on symbols without volume. Most spot forex pairs on retail platforms don't report true volume — they report tick count, which is a proxy but not the same thing. For real volume analysis on forex, use the equivalent futures contract (6E, 6J, 6B, etc.) instead.
The baseline needs history. If your chart has fewer than 21 sessions of historical bars, the baseline averages whatever sessions are available. On a fresh symbol or after a long break, the baseline line may be choppy for the first few sessions until it stabilizes.
It is not session-aware for time changes. If your chart has a DST transition or a holiday-shortened session in the lookback window, the stride math will be off by a bar or two for the affected window. The baseline self-corrects within a few sessions as the affected window rolls out of the average.
How this compares to alternatives
The most-installed volume indicators on TradingView are some variant of: Volume + 20-period SMA. That's it. Two plots, one indicator, fine for what it does. The problem is the SMA averages all bars indiscriminately — a 9:30 open volume gets averaged with a 12:30 lunch volume, producing a line that's neither correct for the open nor correct for lunch. It's a one-size-fits-all average that fits no time of day well.
Session Volume Pulse [TSL] takes the opposite approach: every bar gets its own baseline based on the same minute in past sessions. The 9:45 baseline reflects what 9:45 has historically looked like. The 12:30 baseline reflects 12:30. The 3:50 baseline reflects 3:50. When something unusual happens at a specific time, the chart shows it as unusual specifically for that time.
For traders who specifically want the spike-detection feature, there are plenty of "Volume Spike" indicators. Most of them are closed-source, several are paid, and few combine spike detection with a session-aware baseline. The combination of simple visuals + session context + open source + free is rare.
Get Session Volume Pulse [TSL] — free
Open source, free forever, no signup required. Works on any TradingView chart with volume data. Designed for 15-minute charts but works on any intraday timeframe with the bars-per-session setting properly configured.
Published by NicksNotNaked on TradingView. Source code is visible in TradingView's Pine Editor — open the script, click "Source code" to inspect or fork.
Frequently asked questions
What exactly does the baseline line represent?
For each bar, it's the average volume from the same time of day in the past 21 sessions. On a 15-minute NQ chart, the 9:45 AM bar's baseline value is the average of the 9:45 AM volumes from each of the past 21 trading days. The line shows the typical session pattern: high at the open, dipping through lunch, rising into the close. The current bar's height versus the line tells you whether right now is busier or quieter than the typical session at this same minute.
What does "bars per session" do and how do I set it?
Bars per session tells the indicator how many bars are in one full trading day for your chart. The default of 0 auto-detects assuming a 24-hour session, which is correct for crypto and forex and close enough for 15m futures. For NQ/ES/MNQ/MES futures on other timeframes, use 1380 (1m), 276 (5m), 46 (30m), or 23 (1h). For US stocks during regular trading hours (RTH 9:30–4:00), one session is 6.5 hours, so override to 26 bars at 15m, 78 at 5m, 390 at 1m, or 13 at 30m. If the baseline line looks erratic or doesn't track the typical session shape, your bars-per-session is wrong.
What timeframes is this designed for?
Optimized for 15-minute intraday charts of liquid futures and stocks. It works on any intraday timeframe (1m through 1h) as long as you set bars-per-session correctly. On 4-hour and higher timeframes the time-of-day baseline becomes meaningless — only about six bars fit in a futures session at 4h, so there isn't enough sample density for a meaningful "same time of day" average. Disable the baseline on 4h+ and use only the spike detection on those timeframes.
Why don't you use TradingView's built-in session functions for this?
Pine Script v5 has session-aware functions, but they don't handle every market cleanly. Different brokers report different session windows for the same symbol; futures contracts have multiple session definitions; some symbols have extended hours sessions that interleave with regular hours. The manual bars-per-session approach is more explicit and avoids edge cases where auto-detection would silently produce wrong results.
Why did you cut so many features from the original version?
The first version had spike detection, mega-spike detection, divergence tints, z-score plots, a corner info table, and five alert conditions. It worked but the visual clutter made the actual signal harder to read, not easier. After testing on real charts we noticed the divergence tints firing on most trending bars (signal-to-noise too low) and the info table being ignored (too much to read mid-trade). The simpler version surfaces only what matters: is this bar unusual right now, and is volume above or below the session norm. Two questions, two visuals.
Is the spike threshold of 2.5× the right number?
2.5× is a good starting point for 15-minute charts of liquid futures and stocks during regular hours. Lower timeframes generally need a higher threshold (3× or 4×) because volume is naturally choppier. Higher timeframes can use a lower threshold (1.8× or 2.0×). If you're getting too many or too few spike labels for your taste, this is the single setting to adjust.
Does this work for cryptocurrency?
Yes, and the session baseline works particularly well for crypto because the market trades 24/7 with no session gap. Leave bars-per-session at 0 (auto-detect) and the baseline correctly compares each bar to the same UTC time across past sessions. The only caveat: low-volume altcoins may have so much noise in their volume that no baseline can smooth it usefully.
How is this different from the Volume + 20-period SMA that most traders already use?
The 20-period SMA averages the past 20 bars regardless of time of day. So at 9:45 AM the SMA includes 8:45, 9:00, 9:15, 9:30 — bars from very different volume regimes. The result is a line that's neither correct for the open nor for the mid-morning. Session Volume Pulse compares the current bar only to other bars at the same time of day, producing a baseline that's meaningful for that specific minute.
Why is the indicator open source?
Three reasons. First, prop firm traders and serious retail traders should be able to audit the math behind any tool they rely on. Second, closed-source indicators in finance are a known yellow flag — they often do less than they claim or rely on lookahead bias to look better in backtests. Third, an open script the community can read and modify is more likely to improve over time than a black box. The source is on TradingView's Pine Editor when you save the script, and we maintain a public version externally too.
Related guides
- Day trading strategies and volume analysis — how to use volume confirmation alongside price action
- Futures trading guides — NQ, ES, MES, MNQ session structure and microstructure
- Trading education hub — what's actually worth learning
- Trading psychology — why simpler charts often produce better decisions
- Market Regime Detector — complementary tool for daily market context
- P&L Calendar with Prop Firm Tracker — track your trading outcomes
Disclaimer: Session Volume Pulse [TSL] is an analytical tool that displays publicly available volume data with a time-of-day baseline overlay. It does not predict price direction or guarantee any trading outcome. Volume spikes can precede continuation, reversal, or no follow-through at all. Trading futures and equities involves substantial risk of loss. This article and the indicator are for educational purposes only and do not constitute investment, financial, trading, or tax advice. Past chart patterns do not guarantee future results.


